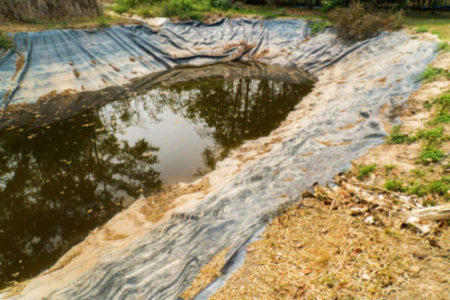
A pond liner is a thick plastic lining that helps keep the water in your pond and keeps it from getting really muddy. Sadly, because it is thin plastic it can be ripped from animals within the pond, or sharp rocks and tree roots underneath it.
Adding cement, mortar, or concrete over the top of a pond liner will add strength and durability to the pond liner. Adding that extra layer over the top of the plastic will also allow you to use a broader variety of decorations and plants.
There are a variety of way and strategies available to help add strength and longevity to your pond liner. There are also good ways to cover up, hide, and protect your pond liner so that your pond can look the best and last the longest.
How to Add Concrete Over Your Pond Liner
After you have smoothed out the ground beneath your pond liner to keep it from being ripped by rocks or roots underneath, and got your pond liner in place, you can add concrete, mortar, or cement over the top. This will protect that small plastic liner from being ripped by anything from plant roots to webbed duck feet and other animal interactions.
- Step #1 – Begin by mixing together the mortar or cement. Normally, this is about three parts sand to only every one part of cement. Cement sticks really well to plastic so hopefully it will go well. You want a thick mud or oatmeal consistency before you begin.
- Step #2 – Apply the mortar to the top of the plastic liner, using a mason trowel to get it flat and as smooth as possible. Make it about 1 inch thick.
- Step #3 – Press rocks, create shelves or placement for plants into the mortar so that is is firmly set at the edges and bottom of your pond. Add more mortar between rocks to help them stick together and be more secure.
- Step #4 – Let the cement dry for at least 24 hours, and then apply a cement sealant and wait a good 24 hours for it to dry.
Placing cement, mortar, or concrete over the top of the pond liner can be beneficial if you plan on having large animals in the pond, or if you just want extra protection for your pond liner. Be sure to let the concrete cure for a week or two before filling the pond with water and make sure the concrete is safe for the watery environment it will be in.
Hiding the Edges of Your Pond Liner
Often times the pond liner that you have isn’t the most attractive thing for the natural water feature look you were going for. It shows around the edges as a big black blob that can be hard to cover up. Putting gravel over the top of it could provide a temporary fix, but if the rain is hard then it washes it away and the black comes shining back at you.
A good way to solve this problem is to mortar rocks along side the edges and allow part of them to hang over the end of the pond. This can be done in a couple easy steps.
- Step #1 – Drain the pond water down a couple inches from the top to give you plenty of room to work with the top edge of the pond. Scrub it clean, and free it of all dirt and debris. Make sure there are not any fish in the pond who could be exposed to any debris from the process.
- Step #2 – Mix the Mortar and water together as explained on the mortar bag. You will want it to be the consistency of thick oatmeal or pancake batter. It should be spreadable, but still capable of holding its own shape.
- Step #3 – Spread the mortar along the edge of the pond liner, only doing sections at a time so that it doesn’t dry to fast. It should be about 3/8 of an inch thick.
- Step #4 – Get boulders ready for placement and as you lay mortar down press each stone down into the mortar, holding it for about 30 seconds to ensure to sticks.
- Step #5 – Begin placing more rocks and mortar closely together until you have completed placing them around the desired edge of the pond (or the whole pond).
- Step #6 – Get a wire brush or trowel and smooth off all the mortar that has squeezed out of the cracks.
- Step #7 – Allow the mortar to dry for up to 24 hours, while watering it down occasionally to ensure it cures properly and as strong as possible.
- Step #8 – Doing this could add a high content of lime to your pond water, which can kill fish. This can be counteracted by refilling the pond with new water, or adding white vinegar and extra water and let it sit for about 10 days before placing fish.
Creating this little ledge around the pond will help to conceal that ugly pond liner and will give the good bacteria you need more places to grow as well as providing fish within the some spots of shade it it gets sunny. Often times, people use flagstone to accomplish this, but really you can use anything which goes with your theme and fits sticks to the mortar.
Other Ways to Add Strength to Pond Liners
Aside from putting cement over the top of your liner, you can do other things to help keep it from being torn, a lot of which are pretty easy and also provide other benefits that concrete may or may not.
- Old Pond Liners – A really good way to add extra protection to your new pond liner is to just leave your old there and try to patch any real big holes. Leaving it there provides extra padding for things beneath the surface and can help with prevention of rips made within the pond.
- Rocks/ Gravel – Rocks can make for a great decorative material and can be placed without mortar or with it. Gravel is really helpful as it will hold down the pond liner and create small faucets where good bacteria can grow.
- Geotextile – Geotextile simply put is fabric put in the ground. It helps to increase the stability of the soil and prevents erosion. Adding this over the top of your pond liner will also add protection and decrease damage.
Thinking of attaching your pond liner to wood? We got you covered. Check out our article Step-by-step: How To Fix Pond Liner To Wood.