If you’ve been wondering how easy it would be to join an old liner with a new one, it is as simple as you can imagine.
To install a new pond liner over an existing one, you should drain the pond and remove everything in it, check the old liner for holes, choose a new liner and remove wrinkles, then glue or otherwise attach it to the old liner.
Installing new liners only takes a few simple steps in order to insure both liners are joined smoothly.
When to Put in a New Liner
When you start to notice that water is possibly leaking out of your liner, or there is an access amount of dirt or floaties in your pond, it may be time to put a liner in your pond. However, something to consider is whether you have an excess of aquatic life or animals in your pond. You don’t want to disrupt them when their breeding months are during the spring. Be mindful of this when changing your liners.
Winter months are best because the aquatic plants in your pond are in a state of hibernation, as well as your fish and aquatic animals. You don’t want to disrupt any form of life in your pond when their most active months are during the summer. It is easier to take out a small amount of fish and flowers during the winter than it is during the germination period.
Just a side note, doing this during the summer is also incredibly laborious because it is hot, sticky, and overall not fun. It is highly recommended to not do it during the summer.
Remove Everything Inside Pond
Now that we have determined what months are best for changing the liners in your pond, we need to take out everything inside the pond in order to protect it so as to put it back in once it is all done. First, take out all of the debris that is resting in and around the pond. Clean the pond so that nothing gets between the old liner and the new liner.
Keep in mind that any dirt that gets between the old liner and the new liner can create holes between both, which lessens the life of the new pond liner.
When it comes to the aquatic flowers and plants; make sure that there are plenty of buckets with water in order to keep all of the life alive. Now the fish can come out as you slowly drain the water. Fish are a lot more delicate to changes in temperature, so changing liners has to be a quick and smooth process. Any rocks and other things resting on the bottom of the pond can now be taken out.
Check Old Liner for Holes
Something that is noticeable if your pond is showing signs of needing a new liner is that the old liner may have holes in it, allowing debris to come up into the pond and make it harder to filter and keep clear.
Before putting a new liner on, check for any holes that should be patched before adding a new liner. There should be another liner beneath the old one that helps to prevent holes and leakage, and if that has holes, it needs to be replaced first.
There are kits that you can purchase from virtually any store that are pond liner fixing kits. It is usually just a small, flexible patch that you place over the hole to seal it. It is important to make sure it is wrinkle-free before pressing it down to seal it to the old liner so that there is no chance of debris coming up from the bottom through cracks in the new patch.
The holes need to be small in order to patch them up; if the whole is larger, then it may be best to replace the whole old liner.
Which Liner is Best
There are quite a few options when it comes to making sure that the liner of your pond has an extended life against an old liner. What you want to look for is a flexible liner to lay against the used liner. Flexible liners are far cheaper, tend to have a longer life, and can be custom cut to the specific dimensions of the pond.
Flexible liners need to be cut exactly to the dimensions of the pond, with no excess materials, otherwise it will easily wrinkle and cause problems to the pond. If the liner is cut too short, it won’t be able to perform properly and may need to be started over.
Flexible rubber liners are easy to place on top of another liner with some liner adhesive tape. These liners are easy to add on to if you want to make the pond larger in the future. There are lots of informative videos out there to help you choose which liner, and this one from YouTube by The Pond Digger is incredibly resourceful.
Performed liners are another great option to add over the top of the other pond. This type of liner doesn’t have to be cut because it will natural fit to the dimensions of the hole of the pond. There are a few downsides such as they are more expensive than most other liners, and that there are limited sizes of this pond liner available. The larger the pond, the less availabilities.
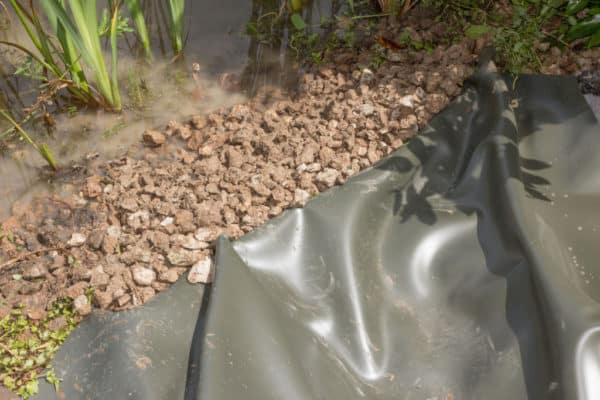
Remove Wrinkles from New Liner
When placing a new liner over an old one, keep it as wrinkle-free as possible. Keeping the liner wrinkle-free means the likelihood of it wearing down faster and getting more holes decreases. A liner will last longer and be more effective at holding less bacteria if there are minimal to no wrinkles present.
After the liner has been laid and it is ready to be filled with water, pour the water in slowly. The faster it fills, the more wrinkles will be pushed up by the speed. Keep the liner flat and make sure to smooth out as the pond fills with water. Try keeping the wrinkles along the liners to the edges and over the sides so that the bottom of the pond won’t get any holes from the wrinkles rubbing against the ground or each other.
A great way of keeping wrinkles out of the pond is by adding plenty of rocks and aquatic flowers to the basin of the pond. Rocks are heavy, of course, and won’t allow debris or wrinkles to move around the liner and cause holes. Aquatic flowers can do the same and clean up bacteria and unhealthy algae growth in the pond.
Gluing or Stapling New Liner
There are two ways of laying down a pond liner, but one is slightly better and more effective than the other. Gluing down a liner is a little more time consuming, but will lengthen the life of the new pond liner. Spraying down some quick prime adhesive along the seam of both liners will stick it together perfectly.
Again, make sure to smooth out wrinkles as you spray the adhesive and lay down the new liner. By gluing down both of these liners it will prevent debris from getting between both of these liners and causing holes. It may take a few moments to dry, but the winter air will help it to dry quicker. Some resourceful information can also be found by Dripworks on YouTube.
The thing about stapling liners is that the likelihood of there being cracks between both of these liners is too likely, and will allow tiny rocks and debris to get in between them and cause more holes between both liners. Stapling is cheaper and won’t take as much time, but won’t help to prevent holes or wear and tear against both the old and new liner.
Best Adhesives to Join Ponds
Firestone Spray Adhesive 7877
This particular adhesive is better to glue and patch smaller holes than it is to glue together the entire pond. It does come highly rated and is popular to patch with. It comes in a 22.4 Oz can that can be used multiple times, of course, and can help to patch holes before before joining both liners together.
Tite-Seal PLST325 Self Adhesive Double Sided Butyl Pond Seam Tape
You can either purchase a single roll of this remarkable tape, or boxes of multiples. It comes in a three inch width with twenty-five feet in length. This tape comes double-sided, which is perfect for joining two pond liners together. When laying it down, it has to be laid down carefully because with a chance of wrinkles, rocks and debris will wear it down and cause holes.
Liquid Rubber NeoPond Sealant – Waterproofing Pond and Water Features
Another great option for sealing pond liners together, while simultaneously making it waterproof is this liquid rubber sealant. As it is applied and squished together between both liners, it becomes water-resistant and will help in preventing leaks, extending the overall life of both liners until the need to be changed.
