So you’ve decided to transform your unused backyard pond into a swimming pool. Whether you’ve just bought a house with a pond you’re not interested in keeping, or you’ve decided the upkeep just wasn’t worth it, with a little time, money, and effort, your forgotten pond can become a place for the entire family to enjoy.
1. Determine What Type of Pool You Want
Before you can begin the process of installing your pool, you’ll want to determine what kind of pool you are looking to get. Traditional pools come in concrete, fiberglass, and vinyl.
Though obvious, this is an important step that shouldn’t be skipped. Depending on the type of water feature you are installing onto your property, you may need new or additional permits to build a swimming pool in your yard.
Knowing what kind of pool you want, and how big you are wanting it, will help you look for and find the proper permits you may or may not need. Skipping the permits can get you in legal trouble later on, so make sure to do everything by the book!
The most popular among pool options would be the concrete pool. Being the most expensive of the three, it is also the most long-lasting and flexible in design, but there is a good chance you will need to hire some professional help to make sure everything is installed correctly.
Next in line is the fiberglass pool which most often come in premade, one-piece forms. While not as versatile as a concrete pool, fiberglass pools are more affordable while still being durable.
The vinyl lining is the most affordable pool lining. While it is fairly versatile, it is also less durable than either the cement or fiberglass pools.
Eco Friendly Options
If you’re looking to steer away from the traditional swimming pool, another option that is growing in popularity is a “natural swimming pool.” Natural swimming pools, which are more costly upfront to build, are ultimately cheaper to maintain due to the lack of chemical upkeep needed in traditional swimming pools.
Also called “aquascapes”, these natural pools use plant life and beneficial bacteria to stay clean and healthy, and look much more natural than a concrete pool while still retaining its main recreational function.
2. Obtain Necessary Materials
Now that you know what type of pool you want to create, you need to gather the materials for that pool such as pool liners, pumps, and any landscaping you might want to include.
3. Drain the Pond
After removing any fish or other pond animals, pump out the water in the pond and allow the earth to dry out.
One of the easiest ways that you can drain your pond is witha submersible pond pump. Directing the water out into the area you have designated for your water drainage, you will put the pump in the deepest part of the pond.
Another type of pump you can use is an external pond pump. These work similar to the submersible pond pump except the pump itself remains outside of the water, using two hoses to pump out the water.
A slower method to drain your pond is with a solar pump, which are best used for smaller ponds.
If you do have a smaller pond, but don’t want to invest in a pump, siphons are probably your cheapest option. This method works best if your pond is elevated, maybe on a hill. This is a slower method and can take a while, but is a viable option if you have no other alternative.
4. Reconstruct the Hole
Now that the water has been drained and the pond dried out, you can go ahead and dig out the rest of the pond to meet the needs of your pool. There’s a good chance that you’re going to need professional help at this point.
Depending on the size of the pond you had, and the size of the pool that you are wanting, you could have quite a bit of manual labor ahead of you if you decide to do all this digging yourself.
You’ll need to contact a local company to come and assess your pond and pool plants to get an accurate quote, but it can cost around $35,000 to install a pool into your yard. Another option available to you would be the rental of a backhoe.
It would be more costly than digging by hand, but it would cheaper than having someone else do the digging for you, and it could save you some money on the installation in general.
5. Install Filtration System
With both traditional and natural swimming pools you will need to install pumps and filtration systems.
Paying a pool company to install a pool in your yard, but if you’re doing the work yourself, you’re going to need to purchase quite a few parts.
One of the least expensive filters you can get for your pool is the sand filter. As water enters the filter, it will pass through a special kind of sand that will filter out different things as it goes through. The sand and debris will remain in the filter as the water leaves.
Another type of filter you can use is a “diatomaceous earth” or DE filter. Similar to the sand filter, the DE filter has sets of grids coated with a powder of crushed seashells. As the water goes through the filters, the powder is able to trap much of the dirt and debris that goes through.
The powder does have to be replaced when it is backwashed in the cleaning process. Because of this, this filter type can cause some health hazards, so you should take that into consideration before using a DE filter.
If creating a natural swimming pool, you will need to designate a “plant zone” away from the main swimming pool. This will be part of the filtration system. At the furthest point away from the pool, you will install the pump and skimmer system. running the pipes under the ground so that, “water runs through the plant filter before reentering the rest of the pool.” source.
6. Line the Pool
Now it is time to line your pool. Based on the type of pool you are installing, you may have to first frame your pool before you can do this. Vinyl pools require an additional two days to allow the concrete base to dry before the lining can be installed, and concrete pools can take several weeks to cure.
With the natural swimming pool, once your pool has been lined, you will also want to add some form of gravel to line the bottom of your pool.
7. Fill Pool with Water
The first several times you fill your pool, you need to keep an eye out for leaks, in the pool itself and from the visible pipes. All the mechanical bits and pieces that come with your pool should have a close eye kept on them for the first several weeks to make sure everything is working correctly to avoid long-term problems. It’s much easier to fix things in the beginning than it is to make adjustments later on.
The filtration system is one of the most important parts to keep an eye on, since the filter will have a big impact on the overall “health” of the pool. Making sure the pool stays clean and chemically balanced is going to be the source of most of the maintenance you will be conducting on your pool.
Once you’ve filled the pool for the first time, test the pH of the water using test strips. Sometimes your local water will need to be treated to stay “pool safe” and make sure the material the pool is made form isn’t worn away.
Knowing the base chemical makeup of your water will help to know what you need to add to it to keep the water safe and your pool in good shape. Ask your local pool company what good chemical levels are in your area, and if your local water supply is prone to depositing mineral because of hard water.
Last, but most certainly not the least, you should probably put your pool through a process called “shocking”. This involves putting a large amount of pool sanitizer (more than you will for normal maintenance) in the pool to make sure the entire pool and all the water in it has been exposed to the chlorine.
The exact ratio of pool shock to water will depend on the specific kind of pool shock you use, and the pool’s pump or circulatory system should be left to run with the pool shock for around six hours after it’s been applied.
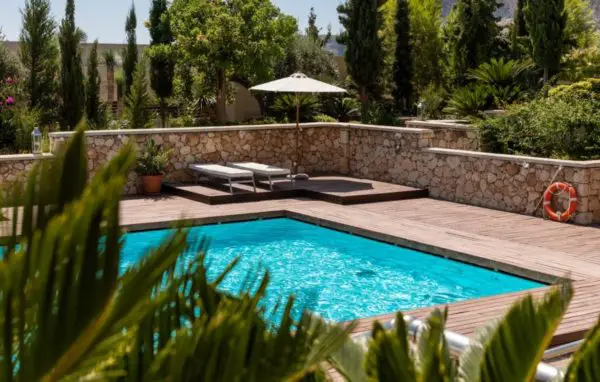
8. Landscape
You now have your pool! Take the rest of your time to clean up the edges, add fancy tiling, plants, and lawn chairs, customizing the area around the pool to fit your dream for the perfect backyard.
If you want to know other ideas on what to do with your old pond, check out this article.
