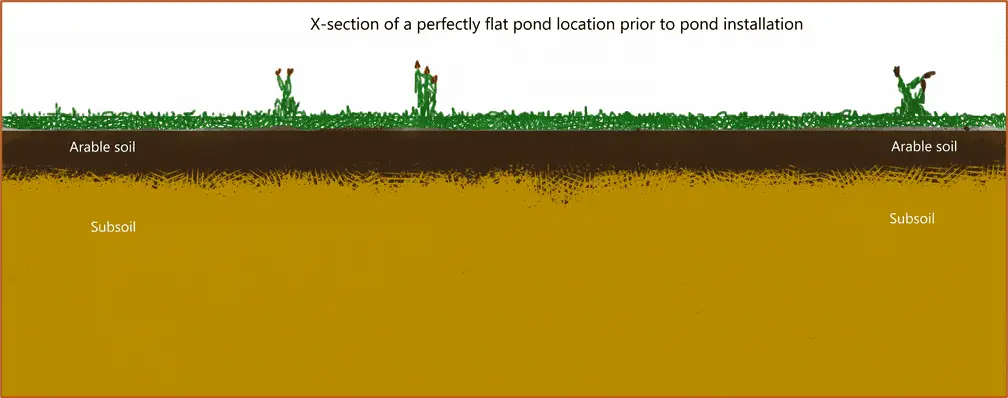
This article presents a step-by-step approach for the installation of a pond liner on a flat surface area. Each step is depicted by a vertical cross-section of the pond location representing the vegetation, a layer of arable soil (high in organic matter), and the subsoil.
The installation of a pond liner on a flat area involves the following steps:
Interested in planning out your first pond? Check out our planning guide!
So here we go!
Initial situation
This is the cross-section of the flat pond area with vegetation, arable soil, and subsoil.
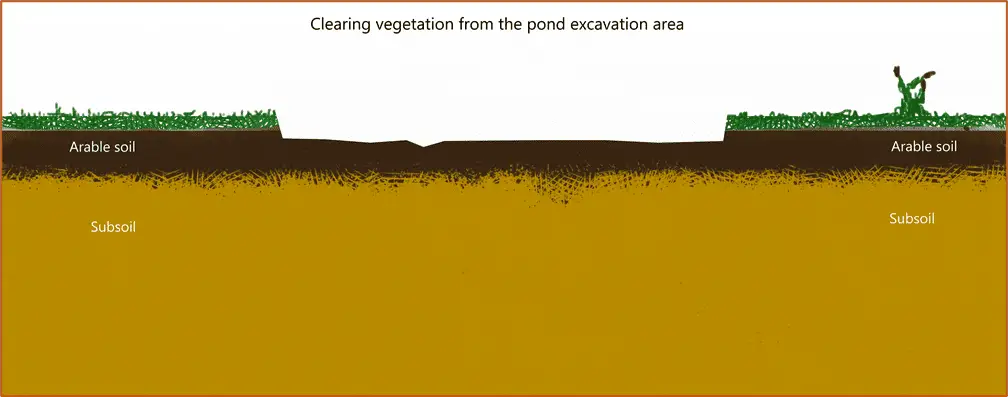
Clearing vegetation from the pond surface
Removal of vegetation and roots from the pond surface area. Keep it separate so that you can replant grass sods and plants near the pond or elsewhere once the pond is finished.
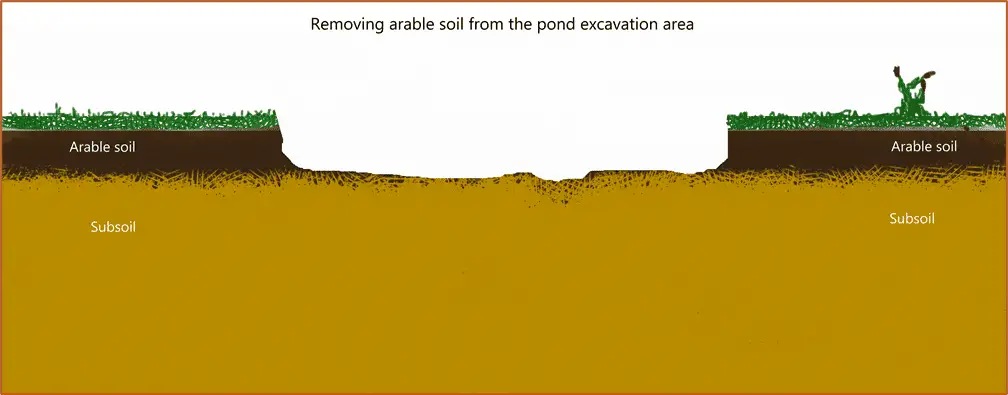
Excavating arable soil from the pond surface
Excavating the arable soil from the pond surface area. Keep it separate so that you can reuse this soil near the pond or elsewhere once the pond is finished.
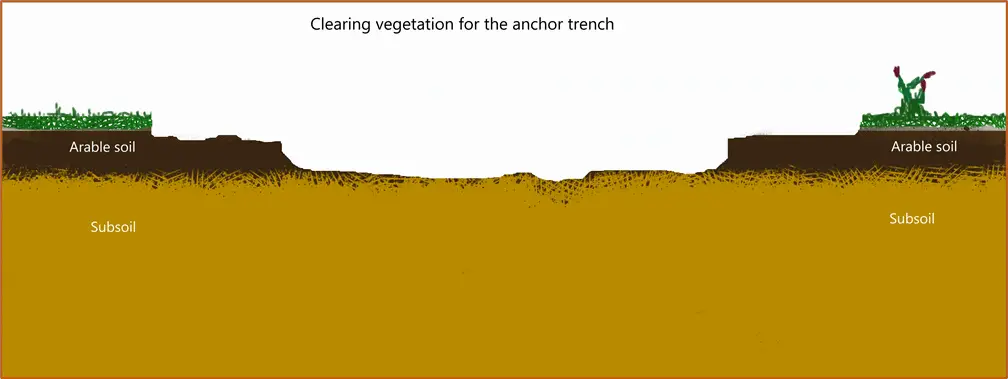
Clearing vegetation for the anchor trench
To fix the pond liner in an anchor trench, you need at least 2 to 3 feet around the pond area.
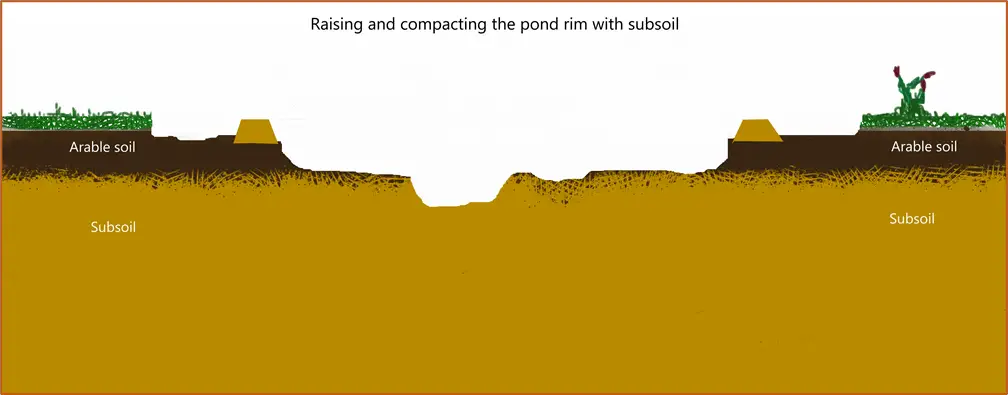
Constructing a perfectly level pond rim
Now, you construct a raised pond rim (minimum 4 to 6 inches) with the subsoil, which contains the least organic material. The rim should be at least 1 foot large at the base. The width at the top of the rim depends on the material you envisage to cover (bricks, stones, wood, …). The rim should be reasonably compacted and perfectly level when you are through. If you consider an overflow for your pond, you can lower one section of the liner, but make sure that there is a natural outflow.
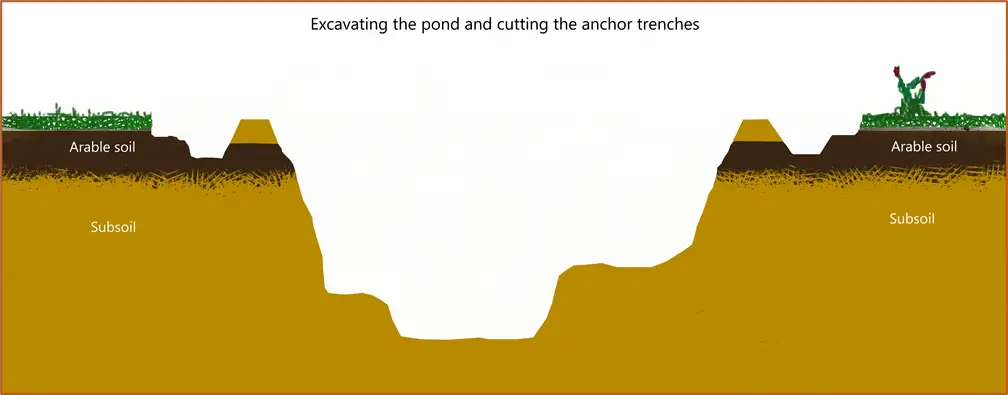
Excavating the pond and cutting the anchor trench
Now you can proceed to excavate the pond and the anchor trench around the pond. The excavation should be free of large roots and sharp stones or gravel. The subsoil should be as smooth as possible, avoiding sharp corners. If needed, you can place an underlay (geotextile or old carpet) to protect the liner from any sharp objects in the soil.
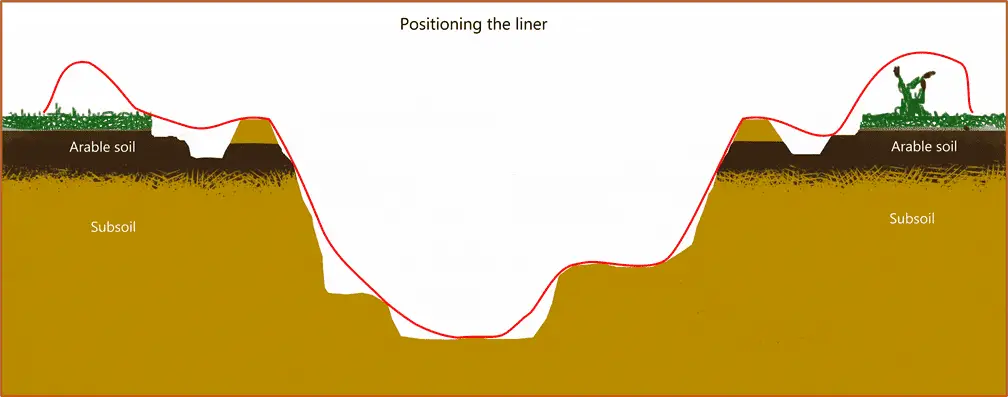
Positioning the liner (red color for better visibility)
When the excavation is finished, you can proceed with positioning the liner. Make sure that you have enough length on all sides to cover the rim and the anchor trench when the liner fits the excavation somewhat tightly.
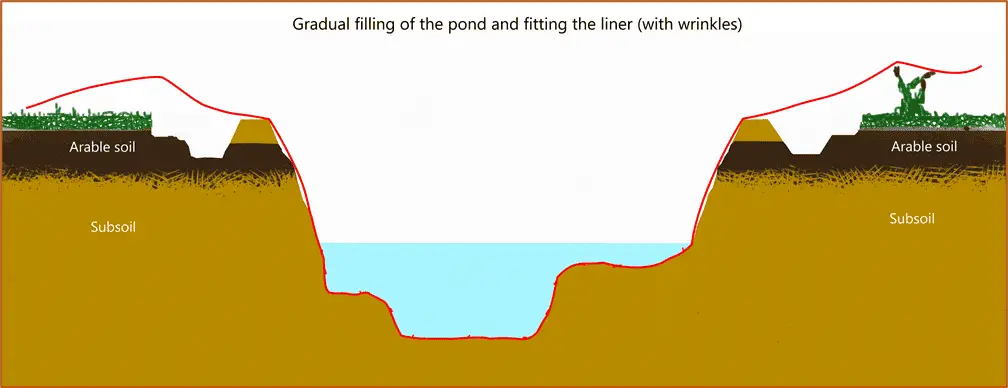
Gradual filling of the pond with wrinkles in the liner
Once you are sure that the liner covers the excavation and anchor trench on all sides, you start adding water to the liner. The weight of the water will settle the liner tightly on the bottom and lower sides of the excavation. Make sure that you have some wrinkles in the liner across the bottom which will accommodate some settlement of the subsoil under the weight of the water from a full pond. You will have large vertical folds in the corners of the pond, but you should still provide some horizontal wrinkles for the purpose of future settlement.
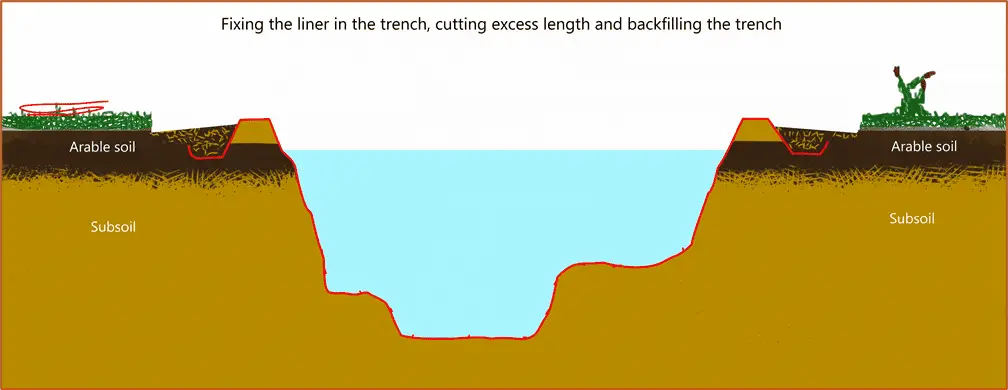
Further fill the pond and secure the liner in the anchor trench
Continue positioning the liner while filling the pond. Try to provide some horizontal wrinkles while covering the vertical folds as neatly as you can. Once you have covered all shelves in the pond and there just remains a stable slope, you can secure the liner in the anchor trench and cut the excess liner (or cover the whole length in the anchor trench). Now you can close the anchor trench with some stones and mostly arable soil for grass or plants. If all is well, you will have a negative grading so that surface water flows away from the pond.
To complete the pond construction, go ahead and install all of your equipment and decorate your pond with plants, stones, and fish. We wish you plenty of success, and enjoy your pond!