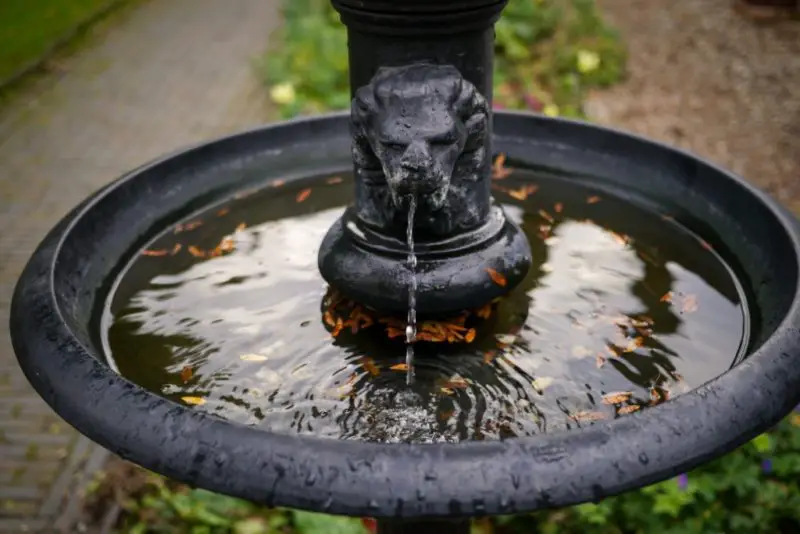
Wiring an outdoor water fountain can be a tedious process, but it doesn’t need to be. Here’s how you can wire your outdoor water fountain.
The process of wiring an outdoor fountain can be broken up into three main steps. First, determine the best local location for your fountain. Next, dig a trench for the wires. Lastly, thread and bury the extension cord.
This process is totally achievable, even for beginners, so long as you follow the following steps.
Determining the Appropriate Location and Preparing it for the Fountain
Before any progress can be made, you first need to figure out the appropriate location for the fountain. Things like access and proximity are important to consider, as they will play a role in the total cost.
Before starting your project, you need to observe safety precautions, as working with electricity is inherently dangerous. Do not attempt to wire any electrical item without first having a licensed electrician observe the area.
After he has observed the area, have him install a GFCI (ground fault circuit interrupter) outlet, which prevents potential electrocution in case you accidentally make contact with the electrical current. After this has been accomplished, it is now time to start measuring.
First, start by measuring and cutting a length of string to the same length as your fountain pump’s electrical cord, then subtract two feet from it. Next, simply measure the distance for your desired location from the GFCI outlet.
Next, write down the measurements to refer back to. After this, all you need to do is position the fountain however you desire. Once this is complete, you will now have an idea of the appropriate measurements and distance for your fountain.
Digging the Trench
Now that you have the appropriate distances determined, it is now time to begin the next step in the process: digging. Begin by digging a trench roughly two feet deep from the outdoor GFCI outlet to your garden fountain pump. The trench only needs to be about 2 inches wide to accommodate the scheduled 40 PVC pipe needed.
Cutting the PVC Pipe
Now that the fountain is positioned and the trench has been dug, we now need to appropriately cut and position the PVC pipe. First, begin by pouring a layer of sand an inch or two deep at the bottom of the trench. This will help provide a cushion for the PVC and will help protects it from rocks or anything else that could potentially cause damage.
Next, measure the length of your trench, this will give you an idea of how much PVC you will need to use. Then, Cut two sections of the 40 PVC pipe to about 18 inches in length. If necessary, you can use full 10-foot sections plus a cut piece, to reach the whole length of the trench. After it has been cut, Lay the pipe in the bottom of the trench and cut the string from the receptacle to a length of twelve feet.
Arranging and Positioning the PVC Pipe
After the receptacle has been cut to twelve feet, attach one end of the string with duct tape onto the plug on the fountain pump’s power cord. To keep it balanced and sturdy, tie a 3/4-inch hex nut on the opposite end of the string.
Then, drop the end of the string with the hex nut on it through one 18-inch piece of pipe. The nut will go through the pipe and exit the other side of the pipe while pulling the power cord with it.
Drop the hex nut through a PVC 90-degree elbow and the beginning section of pipe in the trench. Then, slowly begin to pull the string and power cord through the pieces formed. The 18-inch pipe should be standing up at the end of the trench next to the fountain pump. Now comes the easy part: it’s time to glue the pipes together.
Begin by placing a thick layer of PVC primer on the exterior of the 18-inch pipe and the interior of the elbow. After it has dried, paint a thick layer of glue over those areas.
Next, push the pipe into the elbow, carefully twist it, then hold the two pieces together and wait for them to begin drying. After several minutes, you can now prime the opposite end of the elbow and pipe and glue it together in the same way.
To ensure it stays secure and stable, drop a hex nut through a horizontal pipe piece at the trench bottom and secure each pipe section. Lastly, add an elbow at the end of the trench and the other 18-inch pipes just as you did on the opposite side.
Thread and Bury the Extension Cord
Thread the extension cord through the PVC pipe. If you need to use more than one PVC pipe, simply attach a PVC coupling to the end of the first pipe and continue threading the cord through the second pipe. Keep repeating this same process until you have covered the entirety of the GFCI outlet.
After this, you can now go back and attach all pipes to the PVC couplings. Now, all that is left is to bury the PVC-encased extension cord. Place the PVC pipe in the trench you’ve dug and begin reburying it with the previously discarded dirt.
The easiest way to accomplish this is by simply using a shovel and a wheelbarrow. After you have reburied the dirt, you can pack it dirt down by walking over it for a minute or two.
Assemble the Fountain
Not that all the electrical work has been done, all you need to do now is assemble the fountain. Simply follow the instructions provided in the handbook that comes with the fountain. After this, you are now free to turn your water on and test your new water fountain. Assuming everything runs smooth, congrats, you have now wired your very own outdoor water fountain.
How to Fix any Potential Water Fountain/Wiring Problems
If something is not working correctly with your water fountain, there are several reasons why this may be occurring.
- Diagnosing the Problem: The first step would be to check the power supply to make sure the pump is turned on. Without power being supplied to the fountain’s pump, the water cannot be circulated through the fountain, and the fountain will not function properly.
Another key thing to check is to see if the circuit breaker has blown, as this would obviously prevent the power supply from functioning appropriately. If there there are no problems with the pump itself or the circuit breaker, the next step would be to check the fountain pump’s impeller. The easiest way to do this is by placing your hand on top of the running pump.
As long as you feel a mechanical piece whirring inside, the impeller is running just fine. If, however, you do not feel this, it’s more than likely jammed with debris. If this is the case, you can fix it by running water backward through the pump, which will remove any blockages found in the impeller.
- Major Leak Repair: Check the pump’s adjustment dial to see how high it is turned up. If the pump is leaking water, try turning the dial down to decrease the water flow. Alternatively, if the pump isn’t emitting enough water, turn the dial up to increase the fountain flow. Fill the fountain to the recommended fill line (this will inevitably vary depending on the size of the given fountain).
In order for the fountain to function properly, the hose used to feed the water up through the pump must be completely submerged in water. Simply adding water to the main basin should correct this issue. You can usually tell the water level is the problem if the fountain pump is making louder noises than usual, or if the pump is emitting gurgling sounds.
Turn off the fountain and check the hoses and pump screen for signs of debris. Overtime (especially with an outdoor fountain), dirt, leaves, and other debris accumulate in the fountain and get sucked into the pump. Once the debris has been removed, the fountain should function properly again
- More Minor Leak Repair: Begin by checking again to see if the fountain is leaking by filling up the fountain, then turning off the pump. Next, wait for 24 hours to see if the water level decreases. If you notice a legitimate difference, there is a leak in the fountain, which you’ll need to repair.
Empty the water from the fountain until the crack is exposed to air and ensure the area surrounding the crack is as clean as possible. The type of repair process required depends on what the fountain is made out of. If you’re dealing with a fountain in a pond with a plastic liner, use a liner repair patch composed of PVC sheeting along with PVC sheeting glue to stop the leak.
If the fountain is made of concrete or stone, it must be reinforced by having the cracks filled with a bonding adhesive along with a vinyl-reinforced patching compound.