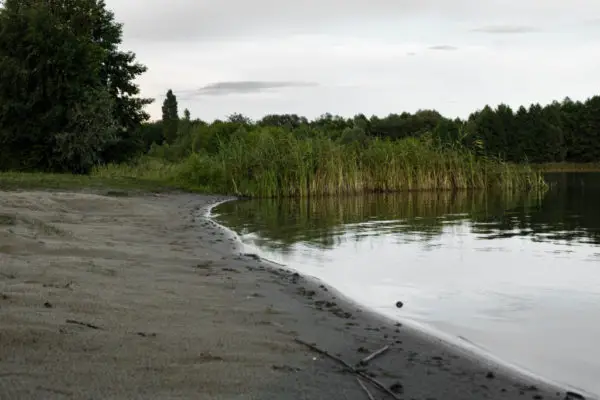
A pond in and of itself its a great addition to a backyard and home. It brings new plant and animal life and offers the calming sounds of water as you step onto your back porch. Adding a beach to that pond will only bring it up a level and add to the pleasing aesthetic you are hoping for. Pond water and sand. The perfect make up for a swimming hole for you or your fish.
1. Check Local Regulations
Depending on the size and scope of your project you will need to reach out to the local zoning board, or the Department of Natural Resources. In some circumstances you may need to get a building permit or have your area checked for endangered plants and animals.
Chances are that you have had to reach out to them before in the pond-building process. They often will set regulations not only on beaches but on the use of water and the fish allowed in your pond. Each region will be different so reaching out to them will help to point you in the correct direction.
Before you call be sure to have the information about your project ready. This includes the dimensions of your pond and your beach, and the amount of equipment and such that you will need. Having that information will help you be better prepared for the conversation.
2. Gather Materials
When preparing to start your beach, you will need lots and lots of sand. “As a rule, for most pond beaches you should plan to cover the beach in a minimum of 6 inches of sand, but do not exceed more than 18 inches. Measure the area for your beach and then calculate the sand depth and the area to cubic feet or cubic yards” Source.
For example if you have a 5 foot long, 5 foot wide pond that has the depth of about 7 inches of sand, you will need about 14 cubit feet worth of sand. For reference, a 50 pound bag of sand makes up about 3 cubit feet and so you would need about 5 bags of sand for a small scale project such as this. Obviously it will also change depending upon the depth of your pond and if it follows a gentle incline.
The Best Types of Sand
A beach can be used for a variety of things including a place to lounge, a place to get in and out of the pond, or even just a pretty scene. Depending on your intended use for the area, your choice of sand will be influential.
Often times in water, sand can get washed away really quickly which will cause you to always have to be replenishing the beach with new sand. There are multiple types of sand you could consider like; fill sand, concrete sand, mason sand, and white beach sand.
Fill sand is a pretty course sand that wouldn’t be the most comfortable option for bare feet and small children. It is a more course form of sand and contains a variety of different sand colors in the mixture. Normally, it is used in construction as a foundation or underlay for flagstone or other types of stone and rock tiles. If you want a more rough beach, this would be a good option that would be less expensive.
Concrete sand is “a mix of cement and sand, one that comes with great coarseness and mixes very well with a variety of paving or hardscape materials” Source. It is versatile in use but has larger granular that work best when mixed with other sand types to create a greater variety. It is normally used as a base layer below pools or walkways.
Mason sand is often referred to as all-purpose sand. This particular kind of sand is one of your finer options, and can be used for a variety of different projects. It has more uniform and consistent granular than concrete sand and isn’t as fine as other beach sands. Because it is in the middle of the granular size scale, it is used for both types of projects.
Beach Sand is probably what you are thinking when you generally think of a beach. Normally it comes in the beautiful tan color we all see alongside the ocean, but you can also get it more white and add to the beauty of your area. It has great appearance, versatility and texture. It is safe to walk on and does not contain larger pebbles like concrete sand.
If you purchase white sand, it is the finest of all the sands on the market and will be beautiful as a addition to your pond. While deciding though, consider the costs and replacement costs as you may need more sand.
3. Remove Weeds
You are now to the point that you must begin to clear the area where you plan to install the beach, any plants, weeds, or tree stumps should be removed. Try to get everything by its roots. For a small scale job it would be easiest to do this manually, with a shovel and wheel barrow.
If the project is to large though, using heavier equipment like a skid-steer or backhoe will help in the process. Make sure the ground is at a good sloping angle into the pond and all things capable of puncturing are removed.
4. Create a Weed Barrier
Nobody wants to create a beach only to have weeds invading the space within a matter of weeks and destroying the appearance and disrupting the sand. While after it has happened there are a few solutions, the best option would be to just prevent it in the first place. When considering which option though, think of the amount of space you have to cover and the depth of sand you plan on laying.
Now that the space looks as though it is ready, you can add a weed barrier. The options for this vary based on the many different perspectives and opinions. You can use a basic plastic liner, similar to the liner you used at the bottom of a pond. This will be held down by the sand and keep weeds from being able to spring up.
You can also use sand mats as a way of preventing weeds and keeping your sand in its designated area. These are helpful as they keep the dark soil underneath from mixing with the sand and turning the beach a different color.
5. Create a Retaining Wall
Sadly, without a retaining wall or barrier of some sort, the sand you put in will only be gradually washed into the pond. A really great demonstration for a retaining wall is contained in the video below. The video also contains good instruction for creating a beach as laid out in this article.
Creating a retaining wall means finding a good place where you want your sand to stop and the real depth of the pond to begin. This way it holds whatever sand you have bucketed in stays there and isn’t slowly mixed into the pond for a murky pond with no beach.
Obviously, this wont solve all your problems and some sand will still slip away, but having this barrier will allow the beach to remain intact for much longer.
Retaining Wall Materials
There are a plethora of options available to create a retaining wall to hold all that sand dirt and water up. There are a variety of price ranges that can be met, but it will also depend on the quality of the wall you are looking of. Having the retaining wall stay intact is important. If it breaks, all your sand will wash away into your pond and you will once again be at square one.
- Treated Pine & Hardwood – This is generally the cheapest option, both in price and in quality. It will not last as long as you need it too due to the water and dirt it will be exposed too. Installing posts periodically throughout the wall will help in the long run though. While hardwood will be more expensive, it may hold up a little longer if treated properly for its purpose.
- Concrete Ties or Sleepers are long rectangular blocks of concrete that are commonly used to box in gardens, flower beds, concrete structures, retaining walls, and a variety of other things. Not many things beat concrete in its strength and durability, so while it may cost a couple hundred of dollars it will do the job well.
- Railroad Ties – These are generally treated to withstand water and ground contact and so they could be a valuable option. Stacking one upon another until you get the the desired height. They are fairly expensive but will help more in the long run.
- Stone, Blocks, Sandstone, etc – There are obviously many other options as well. Some people have even used sand bags to create the retaining wall. Stone blocks, naturally cut stone, interlocking blocks are also all options. It all comes down to how much money you want to spend and the quality you desire.
6. Fill with Sand
Whether you have access to some heavy machinery or you are planning to do with some tough hands and shovels, you should then begin putting the sand behind the retaining wall you have made.
Ideally the retaining wall should be only a couple inches taller than you plan to fill up to with sand. This way it isn’t tripped on or in the way of things and people entering the pond, though it will still accomplish its job of keeping the sand behind it.
Slowly slope the sand up to the bank of the pond creating a nice shoreline that has sand at least 6 inches deep on the shore. You can go all the way up to about 18 inches of sand, but anywhere in between 6 and 18 is a good amount.
7. Maintain the Sand
Even though you have taken all the needed precautions like a retaining wall and weed barrier, problems are likely to still occur. You can help with weeds that pop up by occasionally raking your sand and ripping them out. Raking your sand occasionally will also help to keep plant seeds from sprouting and growing.
Another great way to get rid of weeds that come up as times goes on is the use of herbicides that are approved by the U.S. Environmental Protection Agency such as 2, 4-D.
There are other herbicides that can be purchased, or you can go for a more natural option. This is a common recipe found online which helps to kill the weeds by sticking to them: white vinegar, dish soap, and salt. This should be sprayed near the root system and may have to be done a few times for complete effectiveness.
Now, you are too the point that you can add those pretty beach chair, a fire pit, or any other decoration you have been thinking about. You could even enclose a small part of your beach to use as a sandbox.
Some Last Minute Tips
While creating a beach is fairly simple, it will take a few hours of time and may create quite a dent in your pocket change. Below are some additional tips, as well as some things to think about as you begin the process.
- Don’t let you sand mix with the muddy silt already surrounding your pond. The more contact it has with it, the more likely it is to end up mixing in and becoming a thicker more unmanageable pile of muck than it was before. Prevent this with a plastic liner or something similar.
- If you sand starts to harden over time it may be helpful to till it up, or to use a pick axe or shovel to once again get it loose and versatile.
- Be sure your retaining wall is secure. The consequence of a broken retaining wall are not any fun. Not only do you no longer have a beach, but you have about 6 inches of sand covering the bottom of your pond, making it shallow and making plant growth and repairs more difficult.
